After going on the hunt for suitable fabrics I came across a selection of felts and fake short haired furs. But still I wasn't sure whether this would suit, so I opted for a medium calico - it has that rough, imperfect feel about it just like something the Indians would have used. For the actual stage I feel this material would be alot thicker, but obviously for the scale model a thinner material was needed to be used.
Now I had the material but it didn't have the right tone to translate 'Lion skin' / forest, earthy habitat to the audience...so I grabbed the kettle and a container, an ample amount of tea bags and black food colouring and set to dying. This took a numerous of attempts to get right, the right colour when compared to my research images took a little time to achieve and the method took a few attempts to get right. On my first experiment I decided to empty the tea out of the bag into the boiling water...but I found this just marked the fabric in blotches with tea granules, how was I suppose to know they wouldn't dissolve! The way that worked best was leaving the tea bags to stew in the boiling water for 5 minutes, then adding the pre-washed calico in for about 30minutes to change colour.
The successful method stewing...

Dyed calico hanging to dry

I also tried dying some light coloured twine - the result turned out well, now I had a suitable material to suggest the Lion's mane on the tepee (smoke flaps covering).

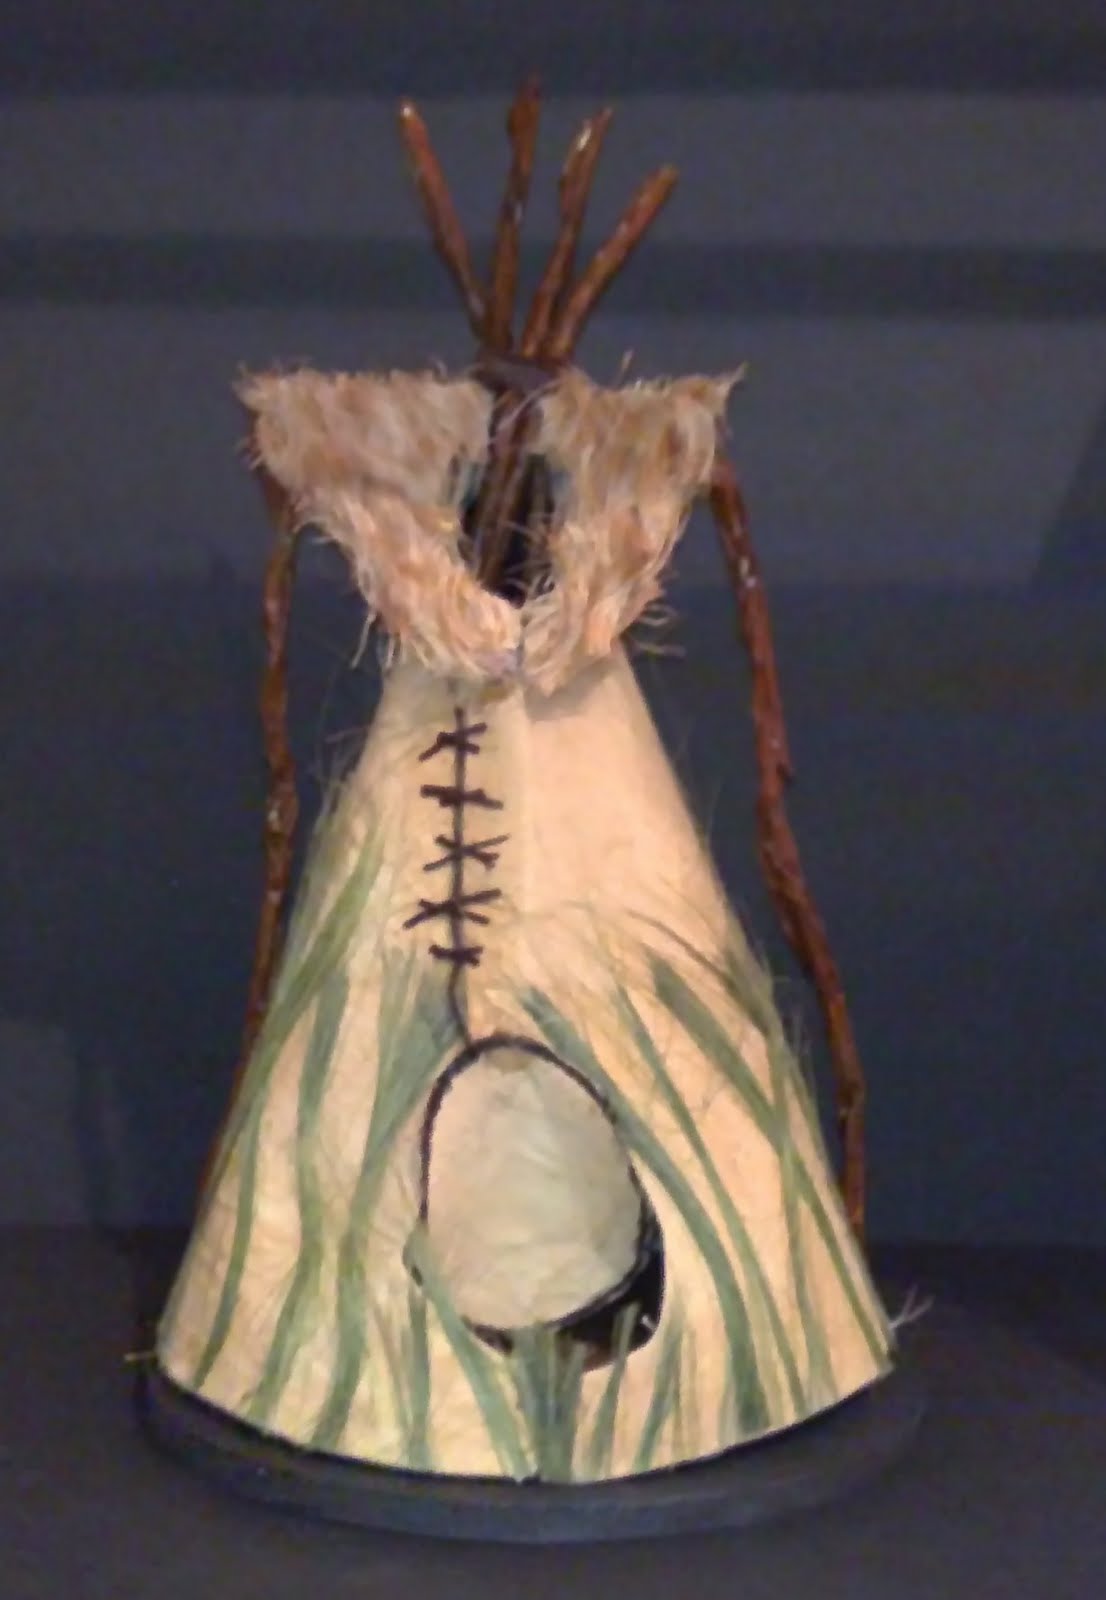
Once dried the calico was pressed - removing nearly all the creases. I must admit I surprised myself with the effect the dye produced on the calico - kind of rich in colour yet patchy in places - just like the tonal factor on the skin of a lion - beautiful.

After pressing the fabric I worked with the template I made when realising my design. I drew the template with a half a centimeter edge all the way round to be able to produce a neat finish when gluing together.
Flat pattern of covering

Once the main part of the tepee was covered it was down to decorating to fit the design. After rummaging around various art shops and collections of bits and bobs I had horded over the year, I realised I didn't have quite the right material to use. What I needed was something to represent long grass, after some thought there was no other option but to dust off my anorak and head to the model railway shop! Well...I must admit I was actually in my element there, so many different textures and little bits to choose from. I came across 'woodland scenic' - a range of scenic materials for model making. After containing my 'excitement' I left with only one bag of grass!
WSFG174
Medium Green Field Grass

http://www.thesignalbox.co.uk/index_new.php?pg=3&p_cat_id=39&prod_id=3144
Flat Pattern of tepee adding scenic embellishments - grass and fur

Following my design and referring to images of actual tepees I realised I need to produce two outer supporting beams as well as the beams (tree branches) for inside the tepee.
For the model I first tried producing these tree branches with modelling clay but soon realised the clay I had was too cheap and was made of a fibrous material. This caused the clay not to be able to be manipulated without becoming wet. This in turn proved useless to create the texture I wanted without waiting hours to dry off.
Failed attempt at tree branches

So I quickly had a brainwave and thought...masking tape! I attempted wrapping around strips of this to the beading wire and to my amazement the effect didn't look that bad.
Make-shift model tree branch stand

Once painted I was happy with my tree branch production effort.
After piecing all the detailing in place with various combinations of glue (pritt stick, PVA, double sized and super glue) I realised the truck for this set piece required some attention from the scenic art department. To keep in tune with the Lion's habitat I decided the truck which the tepee would be mounted on should represent natural ground - so it was all hands to the woodland scenic grass!

I designed the truck a little wider than the tepee base in order to accommodate the stage crew who needs to maneuver this piece of scenery during the performance.

Final checks were made against the figure and scale rule before I was happy with this part of the model.
See additional Bible Sheet for realisation of this set piece.

No comments:
Post a Comment